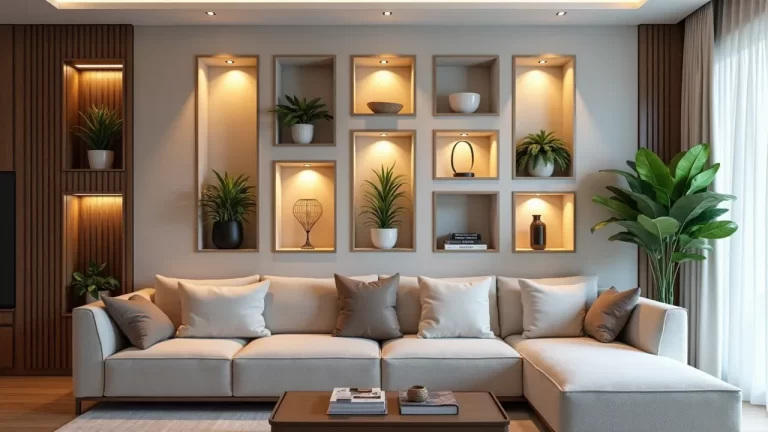
You know those little wall niches in your living room or hallway? They can look plain if left in shadow, but a well-lit niche instantly draws the eye and adds charm. Learning how to light a wall niche with LED or sconces is easier than you think. You can stick LED strips inside for a soft, modern glow or mount a sconce for a stylish, classic touch. Both highlight your favourite items and change the vibe of the room.
To do it, just plan your niche size and style, pick the right light, and place it so it makes your decorations pop. With the right setup, your wall niche won’t just sit there. It will become a feature everyone notices.
Keep reading, and we’ll show you exactly how to light your wall niche with LED or sconces, step by step.
Why Lighting a Wall Niche Matters
A wall niche is like a mini spotlight for your favourite items. Without lighting, it can look dull or wasted. Proper lighting makes it pop, draws attention, and adds depth to your wall.
Whether you go for LED strips or a sconce, you can create either a modern, clean look or a decorative, classic vibe.
So, How To Light A Wall Niche With LED Or Sconces?
Let’s show you the simple ways to make your wall niche stand out. You can use LED strips for a soft, modern glow or a sconce for a stylish, classic touch. Want to learn how? Here’s the answer.
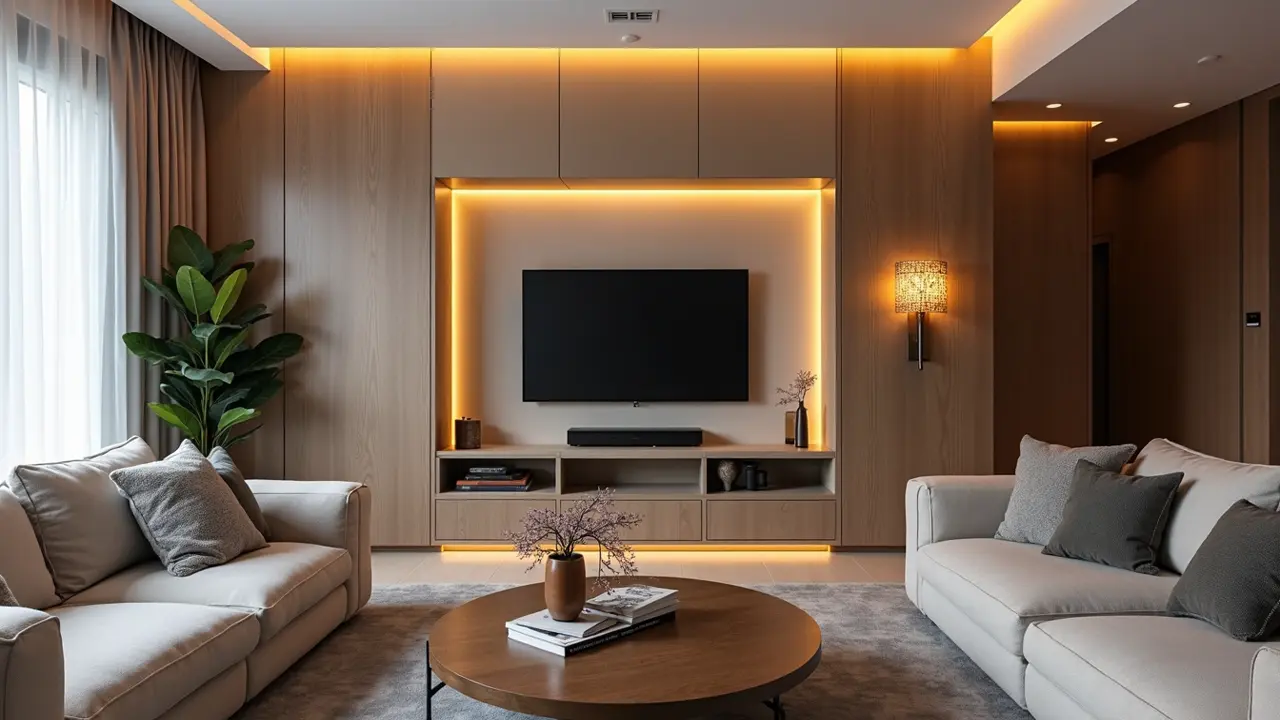
Option 1: LED Strip Lighting
LED strips give a modern, seamless glow. They are hidden, so the light looks soft and clean. This is perfect if you want a minimalist, elegant style. So, why choose LED strips?

- Creates even, soft light
- Modern and sleek look
- Great for highlighting objects without visible fixtures
- Can be dimmed for mood lighting.
Steps to Install LED Strips in a Wall Niche
Now, let’s show you the detailed steps through which you can perfectly install LED strips in a wall niche.
1. Plan Your Lighting
- Decide the direction: top-down, bottom-up, or around the sides.
- Sketch the layout to ensure even light and avoid dark spots.
- Consider using a dimmer for adjustable brightness.
2. Choose the LED Strip
- LED density:Higher density strips give a smooth, even glow.
- Colour temperature:Warm white (2700K–3000K) for cozy look, cool white (4000K–5000K) for bright, modern look.
- Brightness:Low accent (80–100 lumens/foot), bright accent (150–300 lumens/foot).
- CRI (Colour Rendering Index): Look for 90+ for accurate colours.
- Voltage:12V for small niches, 24V for larger or longer strips.
3. Prepare the Niche
- Clean the surface for good adhesion.
- Use an aluminum channel if possible; it acts as a heat sink and diffuses light evenly.
- For wet areas like bathrooms, choose waterproof strips with an IP65+ rating.
4. Mount the LED Strip
- Stick the strip into the channel or directly on a clean, smooth surface.
- Use mounting clips or 3M adhesive pads for extra security.
- Cover with a diffuser to soften the light and hide dots between LEDs.
5. Connect to Power
- Run the LED strip to a low-voltage driver.
- Connect the driver to a wall switch or dimmer.
- For hardwired installations, hire a qualified electrician to ensure safety.
6. Finish the Look
- Hide wires behind walls or use channels for a seamless appearance.
- Test the light and adjust placement if needed.
Tips for LED Strip Success
- Measure the wall niche before buying LED strips to avoid waste.
- Use a longer strip and dim it instead of a short strip that is too dim.
- Waterproof strips are essential in wet areas.
- High-density strips look more professional.
Budget for LED Strip Lighting
- LED strip:$10–$30 per meter, depending on quality and brightness.
- Aluminum channel with diffuser: $15–$40 per meter.
- LED driver:$15–$50, depending on power and dimmer compatibility.
- Installation (optional electrician):$100–$200 for a small niche.
Pros & Cons of the LED Strip Lighting
| Pros of the LED Strip Lighting | Cons of the LED Strip Lighting |
| Invisible light source Modern, clean aesthetic Adjustable brightness and colour | More complex installation for existing walls Requires power planning and wiring |
Besides, want your niche to really stand out? Our expert tips for designing stylish wall niches guide shows simple ways to make them stylish, and the right light completes the look.
Option 2: Sconces or Picture Lights
Sconces give a more traditional or decorative light. They are visible but can also act as a design element. Great for adding a classic touch or highlighting a sculpture or art piece.
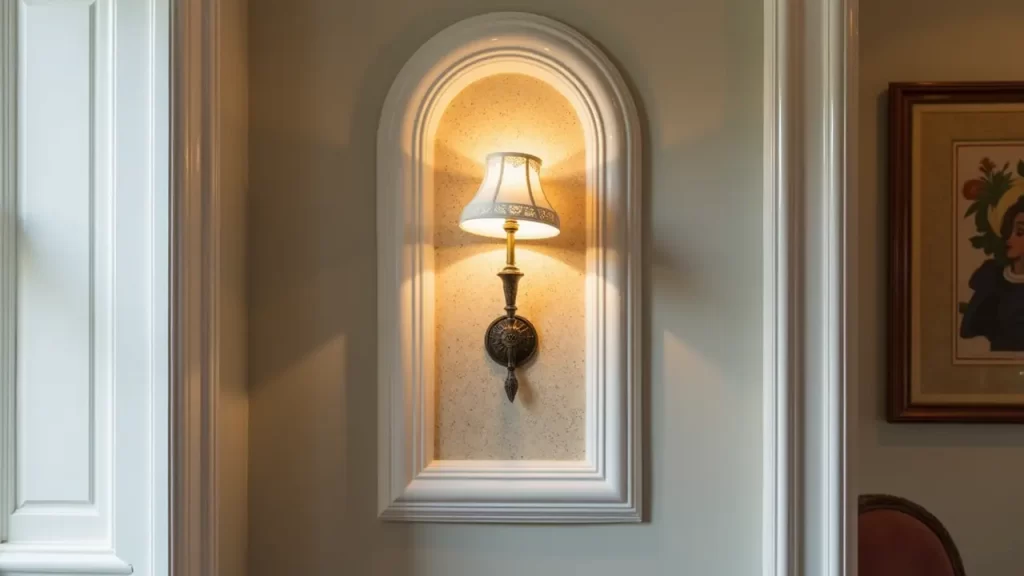
So, why choose sconces to light a wall niche?
- Adds decorative flair
- Provides focused, direct light
- Quick installation with battery models
- Can complement your room’s design style
Steps to Install a Sconce
Follow the steps below to perfectly install a sconce for your wall niche.
1. Choose the Right Sconce
- Battery-powered for easy installation.
- Hardwired for permanent, switch-controlled light.
- Pick a style that matches your room and niche size.
2. Plan Placement
- Place the sconce about 6 inches above the object or the centre of the niche.
- Check the wall material to ensure secure mounting.
3. Mount the Fixture
- Battery sconce:Screw the backplate to the wall and attach the light.
- Hardwired:Install a junction box and run wires to the wall switch. Always hire a professional for safety.
4. Adjust and Test
- Adjust the angle for even illumination.
- Turn on the light to see how it highlights your niche items.
Tips for Sconce Installation
- For battery-powered lights, check batteries regularly.
- Choose dimmable or adjustable models for mood lighting.
- Keep the fixture centred for a balanced look.
Budget for Sconces
- Battery-operated:$20–$80
- Hardwired decorative sconces:$50–$200+
- Electrician installation (if hardwired): $100–$250
Pros & Cons of the Sconce Lighting
| Pros of the Sconce Lighting | Cons of the Sconce Lighting |
| Decorative feature itself Easy with battery models Quick lighting solution | Visible fixture may not suit minimalist styles Hardwired option requires an electrician |
The layout of a niche matters for lighting, too. See our functional wall niche layouts for every room to plan your niche and light placement perfectly.
LED Strip vs. Sconce: Which One Should You Choose?

| Consideration | LED Strip | Sconce |
| Look | Modern, sleek, hidden | Decorative, visible |
| Installation | Harder for existing walls | Easy with battery, harder if hardwired |
| Light Quality | Soft, even glow | Focused and directional |
| Power | Requires low-voltage driver | Can be battery or hardwired |
| Maintenance | Minimal | Battery change or bulb replacement |
Bottom line:Choose LED strips for a clean, modern niche and sconces for decorative, targeted lighting.
Extra Tips for a Professional Finish
- Use diffusers on LED strips for smooth light.
- Avoid running strips near water without waterproofing.
- Combine LED and sconces for layered lighting if you want drama.
- Test different colour temperatures to see which suits your room.
- Plan the wiring before finishing the walls for a seamless look.
Wall Niches with Lighting Ideas
Wall niches are a simple way to make your home look stylish and smart. Add the right light, and your niche can become a real feature.
Use LED strips for a soft, hidden glow or a sconce for a classic, decorative touch. The right lighting highlights your items and gives your room a cozy, inviting feel.
It’s easy, practical, and mess-free. You can also check our BricksBeam homepage for more tips on lighting, storage, and creative wall niche ideas.
Common Mistakes to Avoid
- Using low-density LED strips that create a dotted look.
- Installing in a wet area without waterproofing.
- Placing the sconce too high or too low in the niche.
- Ignoring dimmable options for adjustable lighting.
Besides, do you want to know about the best paint colours to highlight a wall niche? Here’s the detailed guide for you.
Wrapping Up
So, if you’ve been wondering how to light a wall niche with LED or sconces, it’s simpler than it sounds. LED strips give a soft, hidden glow, while sconces add style and focus. Both make your niche stand out and lift the look of your room.
Plan well, pick the right light, and stay safe with wiring or wet areas. A well-lit niche is a small touch that makes a big difference.
If you need any help with wall niche lighting ideas, feel free to email me at calvina@bricksbeam.com — I’m always happy to help!
FAQs
Q.1: Can I mix LED strips and sconces in the same niche?
Yes, you can mix LED strips and sconces to create layered lighting. Use LED strips for a soft glow and add a small sconce or picture light for focus. This gives your niche more depth and style.
Q.2: How do I hide the wires for LED strips or sconces?
You can run wires behind the wall or use small cable channels along the edges. This keeps the look clean and tidy. Make sure the wires are safe and not pinched.
Q.3: What colour temperature is best for a niche?
Warm white gives a cozy, inviting feel, while cool white looks bright and modern. You can try both with a dimmer to see what fits your room best.
Q.4: Can I install LED strips myself?
Yes, if you are comfortable with low-voltage wiring. Stick the strips on a clean surface and connect to a driver. For hardwired setups, it’s safer to hire an electrician.
Q.5: Will battery-powered sconces give enough light?
For small niches, yes, they work well. They are easy to install and don’t need wiring. For bigger niches or strong light, hardwired options are better.
Q.6: How long do LED strips last?
Good quality LED strips can last 25,000 to 50,000 hours. That means many years of use without changing. Always check the rating before buying.
Q.7: Can I use LED strips in a bathroom niche?
Yes, but make sure they are waterproof and rated for wet areas. This prevents damage and keeps them safe. Use an IP65 or higher strip for bathrooms.
Q.8: How high should a sconce be placed in a niche?
Usually about 6 to 8 inches above the items you want to highlight. This helps the light spread evenly and looks balanced.